Design Resource
Traditional Pottery Making - Agartala, Tripura
Ritual Pots
by
Clay is squished until it’s workable. You can check your clay by cutting it in half with a wire. When you cut it and don’t see any air bubbles, it should be good to go. Kneading is best; you can either throw your clay at a surface or head knead it. Get the surface of your Wheel dry. Place your clay dough as close to the middle as you can. Pat the clay down into a cone shape. Center the dough by placing one hand on the side and the other on top of the clay cone. The hand on the side should push towards the middle of the wheel, and the hand on top should just keep the clay from pushing up into a mess. The trick to knowing it is centered is when the clay looks like not moving, but the wheel is moving. This step is extremely important. If your clay is not centered, it will be difficult/impossible to make a perfect pot. It is called wheel wedging, and it helps to condition the clay. Make sure it is still centered when you are done.
Also, until it makes a round hole in the clay or uses the carrot method by pressing your fingertip into the clay about an inch from the center, slowly moving into the center, this method is harder than the first. This method is not useful if you are making something thin. This is called a fishhook. Place one hand on the outside and the other one inside of the clay wall. Make sure they are directly in line with each other. Pull up the walls by starting at the base of the pot and pulling towards the top with even pressure with fingertips. Continue this process until you reach your desired height or until the walls are about a centimeter thick. Pull slower than the wheel is rotating to be even and push very lightly. This may take a while, so you have to be patient. This just takes practice to learn. Experiment with different objects; you can try patterns or pull and push different ways as long as you watch the clay for weak walls or collapsing signs. You stop the wheel, wet the wheel, not the pot, then slowly start away from taking the wire/fishing line and pull towards you until the pot is off, be careful to keep the wire down. Once footed, you use a kiln depending on the clay. Then you glaze it and fire it in the Kiln once more.
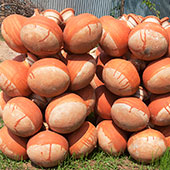
Here in this resource, the artisan is using the traditional method of making pots. She is using a plate of plaster of Paris as a spinning wheel for making the traditional pots. She scraps leftover dry clay from the plate then puts prepared clay dough in it. She slowly rotates the plate with one hand, and at the same time, she gives shape to clay dough with the other hand. She used a wet cloth for shaping the pot. Then the pot is removed very carefully using a sharp cutting tool. She gives the shape to the pot by hammering it with a hammer stone tool. Pots are kept under sunlight for drying. It takes two to three days for drying. These dried pots then heated for strength. This is how the finished products are made.


