Roti and its thinner version, known as chapati are an integral part of the Indian cuisine. The word roti is derived from the Sanskrit word (roṭikā), meaning "bread."
It is particularly popular in northern India, Central India and Western India. Rotis are one of the most common forms in which wheat, the staple of northern South Asia, is consumed. Chapati is a form of roti (bread). The words are often used interchangeably. While roti refers to any flat unleavened bread, chapati is a roti made of whole wheat flour and cooked on a tawa (flat skillet). It is normally eaten with curries or cooked vegetables.
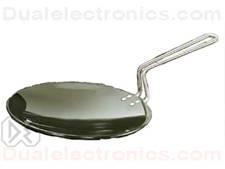
Modern metal tawa
[Image source]
A roti, made of a dough similar to that used to make chapatis and cooked in an oven, is a 'Tandoori roti'.
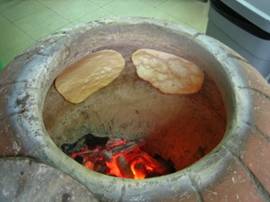
Tandoor (oven)
[Image source]
The combination of wheat flour with one or more flours (e.g. chickpea (besan), maize, or millet) will produce a "missi roti". Rotis made with pearl millet(bajra) or maize(makka) or (jowar) flour usually carry the name of the flour, as in "bajra roti" or "makke ki roti"
Often, the top of a chapati is slathered with butter or ghee (clarified butter). A piece of chapati is torn off and used to pick up the meat or vegetable dish (es) that make the meal. It is folded into a sort of loose cone and used as a scoop to eat the more liquid dishes at a meal like dal.
Chapati sizes (diameter and thickness) vary from region to region and kitchen to kitchen. In Gujarat, for example, the chapati is called a 'rotli' and can be as thin as tissue paper. Chapatis made in domestic kitchens are usually not larger than 15–18 cm in diameter since the 'tawa' from which they are made comes in sizes that fit comfortably on a domestic stove top. Tawas were traditionally made of unglazed earthenware, but are now typically made from metal.
Some household simply use a kitchen work top as a sort of pastry board, but homes have round flat-topped 'boards' specifically for rolling out chapatis that may be made of wood or white marble. The shape of the rolling pin also varies from region to region.
Different types of Roti Makers:
Wooden board-Chakla with a rolling pin-Belan :
Chapatis are made from a firm but pliable dough made from whole grain wheat flour ‘Atta' (as it is known in most of the North Indian languages) and water. Some people also add salt and/or oil to the dough. Small portions of the dough are placed on a raised round wooden board called Chakla and rolled out into round discs using a rolling pin called Belan. The rolled-out flat disc is then placed on a preheated dry tawa and cooked on both sides. In some regions it is only partly cooked on the tawa, and then put directly on a high flame, which makes it blow up like a balloon. The hot air cooks the chapati rapidly from the inside. In some parts of northern India (e.g. Punjab) and Pakistan, this is called a phulka (that which has been inflated).
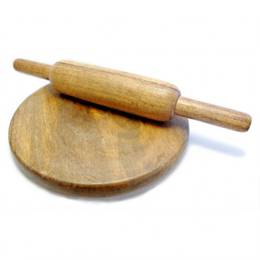
Chakla and Belan
[Image source]
Roti/Puri Press: This press is used to flatten roti/puri dough into thin, circular, pancake-like pieces, which are then fried or toasted. This is a time saving device, that makes the rolling pin obsolete.
Electric Roti Maker
This is an appliance, which reduces some of the steps from the roti making process (namely the laborious rolling the roti with a rolling pin) thus making it easier and faster to prepare a large number of rotis.
This is the electric roti/chapati maker. It cooks the roti without rolling out the dough first. This machine replaces the rolling pin and the round wooden board, the tawa and the stove. They require no oil for preparation so contribute to better health. They are economical as they save gas.
One hour of electric roti maker consumes just a little over 1 unit of electricity. It also frees up the gas stove for cooking other stuff.
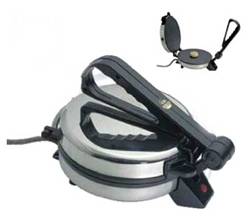
Electric Roti Maker
[Image source]
Roti makers usually have a nonstick coated surface and are electrically operated. These are manufactured using food grade stainless steel which ensures their durability.
Key Features
A roti maker has a heavy-weight die-cast aluminium or stainless steel top and bottom cooking plates that quickly and uniformly distribute heat so there are no hot spots to scorch rotis.
It also has a cool touch handle.
The plates are coated with nonstick material for easy release and simple wipe-clean convenience.
It has a chromed steel housing.
An automatic temperature control takes the guesswork out of cooking, and a light signals, when the roti maker has been heated to the proper temperature.
Some roti makers have a heat adjustment dial for setting various temperatures.
A convenient cord storage reduces clutter, and the appliance can stand on end for space saving and easy storage.
Instruction Manual and Recipe booklet are included with most roti makers.
One Year Limited Warranty from manufacturer for any manufacturing defect too is an added advantage.
Method of Preparing the Roti/Chapathi Using an Electric Roti Maker
• Take 2 cups wheat flour, add 1/2 tsp. salt and mix well with fingers.
• Add a little water at a time and mix to bind the dough loosely.
• Now use both hands and knead dough till a soft, elastic, texture is obtained.
• For still more smoothness, grease palms with a bit of ghee.
• Now knead dough again, lightly.
• Cover with a moist muslin cloth and keep for 10 minutes at least before using.
• If made many hours ahead or if extra, store in refrigerator.
• Take care to cover well or wrap in cling film to keep the texture same.
• This dough will make about 15 thin rotis.
After 1 hour switch ON the roti maker . Before switching ON open the lid of roti maker. A red light will be come on. One can start preparing the rotis once the red light is off (this means the roti maker is sufficiently hot ).It takes nearly 5-10 mins for this to happen . In the mean time the balls of dough can be prepared by smearing a drop of oil on the palms.

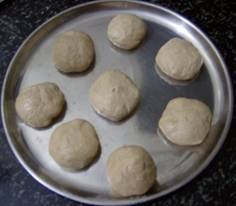
Now take one ball of dough , make it little flat with the palms and put it near to the lid of the roti maker. Do not put it at the center . Just as shown in the picture below for better understanding.
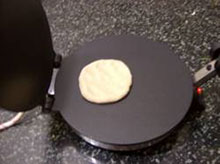
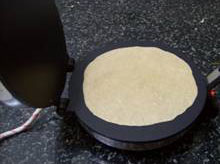
After 2 minutes of opening the lid, small small bubbles are formed on the top surface of the roti. Reverse the roti (use either wooden spatula or nonstick spatula , do not use steel spatulas as they would scratch the non-stick surface).
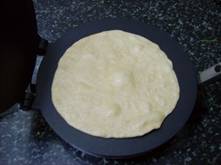
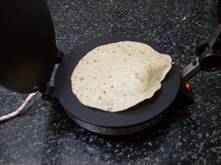
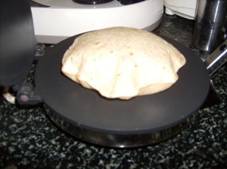
Now hold the lid down slowly and try to close the lid of the roti maker, though not completely and hold for few seconds and open again. This will give the roti sufficient heat. Rotate the roti and again close the lid like before. Open immediately after 1/2 minute. By this time a fluffy roti will be formed.
[Images source]
The roti is ready to be taken out and can be served hot. In this way 1 roti can be prepared in 1 minute.
Disadvantages of the roti maker (in terms of usage):
The roti maker has disadvantages too. One cannot eat these rotis after 2-3 hrs of making them as they turn hard which means that they must be consumed immediately when they are hot or within less than an hour of preparing the rotis. Also frozen dough cannot be used only freshly prepared dough gives fluffy rotis.


