Introduction to Day 26
Today, under Warm up, we do a quick recap of Workouts in all sessions, upto Day 25.
Under
Workout - Strip Forms and Lettering - I
Perspective - Lettering in Perspective
Warm up
15 minute Exercise:
0-5 mins : Practice very fast hand and body movements while drawing Horizontal, Vertical and Inclined Lines, Curvatures, Radial Lines and Rings, followed by various Sinuous Lines and Springs.
5-15 mins : Now, repeat the various workouts covered in Session-1-6 WITHOUT the underlay grids and WITHOUT LOOKING! As a warm up exercise, the focus must be on maintaining correct hand and body movement while drawing the lines fluently.
While drawing these, remember to:
1. Draw them for various lengths, diameters and radii, as we practiced earlier.
2. Draw lines in either direction and curvatures, both clockwise and anti-clockwise.
3. Draw them at various pace - fast, slow, fast to slow in a single line, etc.
This practice of initially drawing the lines fast and then slowing down will help your body get into smoother drawing action for the workouts and perspective exercises ahead.
Do ensure that you keep aside a few minutes to draw cubes and cylinders in perspective space.
<Warm up Ends>
Workout
Discussion: Strip Forms in Perspective
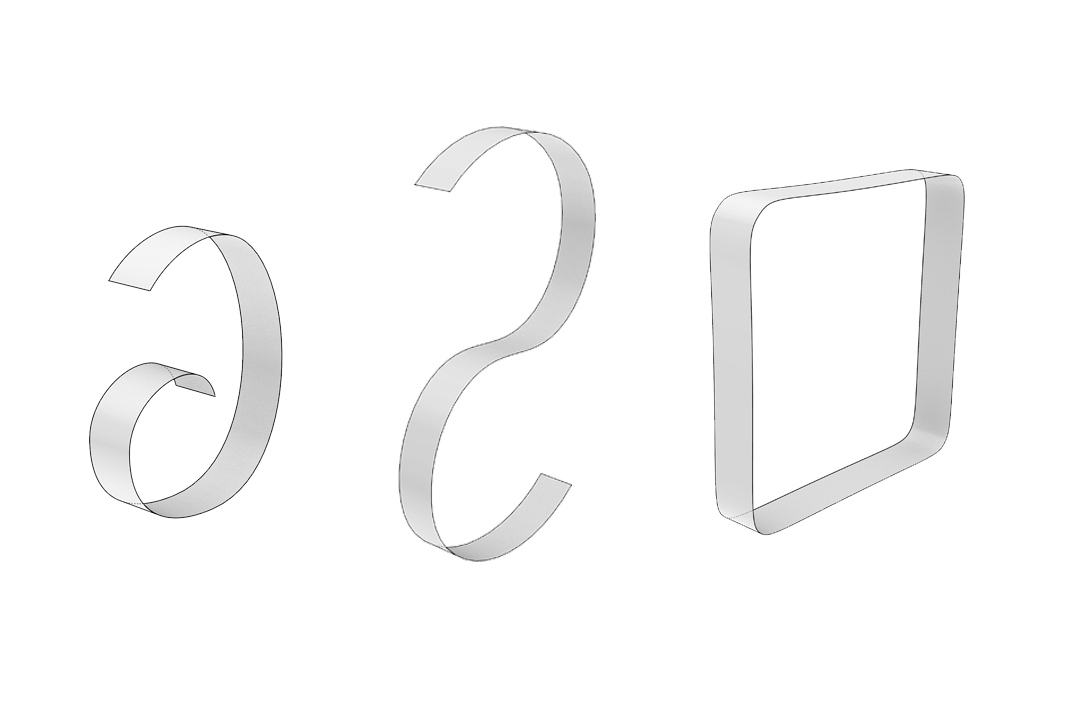
Practicing with stripforms helps develop the skill of handling complex surfaces in perspective. To accomplish a good strip form in perspective begin by drawing a simple curve in perspective space, then adding another next to it, such that both curves appear to be the edges of a thin, flat, curvy strip suspended in space, as shown in the examples below. Preferably draw using continuous lines.

Image 26.1: Simple Strip Forms
1. Aim: Drawing Strip Forms in Perspective correctly
Self-evaluation criteria:
• Feel of perspective in Strip Forms and Letters
• All elements on sheet must share the same two vanishing points
2. Set up:
Tracing sheets, measuring ruler.
3. Exercises follow:
26.1) Simple Strip Forms - 15 mins - 1 sheet
Repeat these figures and generate atleast 10 more of such variations of your own on your sheet. It is important that all these strip forms appear to belong to the same perspective space.(Decide the Vanishing points in advance!). Also, remember that some parts will seem hidden!

Image 26.1: Simple Strip Forms
Note: You can also create more variations for yourself by taking a long strip of stiff paper of about 3 cms width and bending it at certain points, and then trying to redraw them. Preferably take a strip that has 2 different colours on either side for easier visualization. Further, you can mark an edge on the strip to keep track of the bending of the strip, during practice.
26.2) Simple Strip Forms/Varying orientation - 15 mins - 1 sheet
As another interesting extension to the exercise, now try drawing the same strip forms you just did, now at different orientations in space. See example below. DO NOT USE the paper strip for visualising the srtipform from a different angle - you should by now be able to see it in the mind's eye!

26.3) Complex Strip Forms - 15 mins - 1 sheet
Now, draw complex strip forms with variations in terms of width or number of bends or having an unusual orientation. They could contain more than one bend, even at an acute angle therefore involve more complexity. A few samples are provided below for your reference.

Image 26.2: Complex Strip Forms
26.4) Letters as Strip form - 30 mins - 1 sheet
Using continuous lines, draw capital letters of the English alphabet in perspective space as strip forms. Do this for all the 26 letters. A sample for the letter 'A' is drawn below for reference.

Image 27.2: Strip form Letters by a learner
Sense of Perspective Space
Discussion: Lettering and Graphics in Perspective
Designers often have to present their products alongwith a company's branding, label or logo. It is therefore useful to learn how to do near accurate lettering in perspective. Use of reference lines really aids the process. The important part is getting the junction points within a letter,as that of 'A', or the lines of the more curvy letters such as 'C'.
1. Aim: Doing Lettering on 3d planes and objects in Perspective correctly
Self-evaluation criteria:
• Feel of perspective in Strip Forms and Letters
• All elements on sheet must share the same two vanishing points
26.4) Lettering on Planes in Perspective
Draw Planes in Perspective, as you did in the previous session. Considering 1 cm offsets from each of the sides, write a series of the letter 'V', as shown in the image below.
Series of 'V'
Start by writing the letter 'V' in block letters on this area. Write another 'V' next to it. You may use reference lines for this. Continue till you reach the edge of the label curving behind. Repeat for the following letters:
(a) C
(b) G
(C) Z
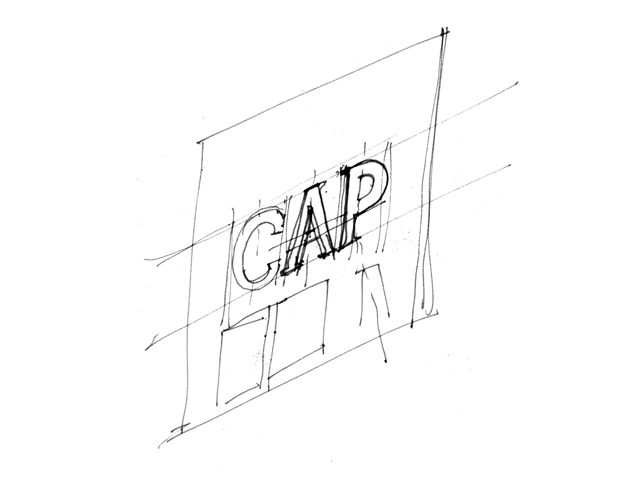
Now, write the letters 'CAP' onto a Plane in perspective at 45 degrees to picture plane
 Image 27.2: 'CAP' written on a Plane at roughly 30 degrees to picture plane in Perspective

Image 27.2: Worksheet
Lettering on a Cylinder in Perspective
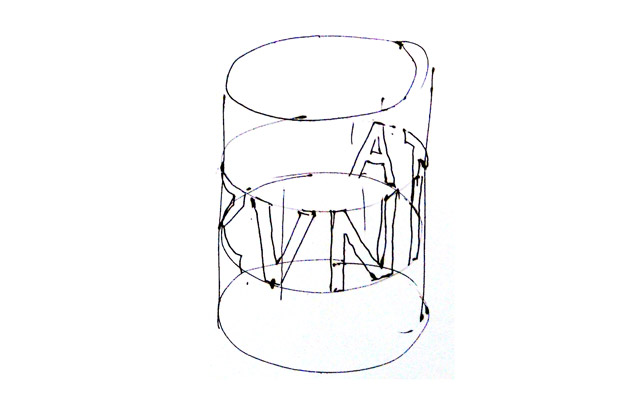
Resketch the Soda can you did on Day 19 but now, in 2-point perspective space, intuitively. Mark the location of the label in this case, as shown in the image below.
(Download link to worksheet). Now, do the branding for this company which calls its product 'POP'.
Start by writing the letter 'V' in block letters on this area. Write another 'V' next to it. Use minimum reference lines. Continue till you reach the edge of the label curving behind. Repeat for the following letters:
(a) C
(b) G
(C) Z

Image 27.3: Lettering on a curved surface
Using the same worksheet, now write 'CAP' onto the surface of the bottle you sketched on Day 10.
< Workout Ends >
Lettering on Curved Surfaces in Perspective?
Write
Curved Surface Text - fanta bottle
< Sense of Perspective Space and Day 26 End >