Introduction to Day 22
Today, under Warm up, we do a quick recap of Workouts in all sessions, upto Day 21.
Under Workout,we learn how to draw 'methods-free' perspective as naturally as we can.
In Sense of Perspective Space, you learn how to draw spheres in space.
Preparation:
• Download and Print:
1. D22_Grid-reference-sheet-for-session-6
2. D22_3d-grid-for-drawing-spheres
3. D22_three-spheres-in-perspective-solution-sheet
• Grids: Grid G14
• Tracing sheets, Soft pencils
• Measuring ruler (for Sense of Perspective Space exercise today)
• Music
Overall Time Plan: - 1. hours
• Warm up : 15 mins.
• Workout : 90 mins.
• Sense of Perspective Space : - mins.
Warm up
15 minute Exercise:
0-5 mins : Practice very fast hand and body movements while drawing Horizontal, Vertical and Inclined Lines, Curvatures, Radial Lines and Rings, followed by various Sinuous Lines and Springs.
5-12 mins : Now, repeat the various workouts covered in Session-1-5 WITHOUT the underlay grids by CHANGING TOOL (using paintbrushes of different sizes, say 0,6 and 12 today)
While drawing these, remember to:
1. Draw them for various lengths, diameters and radii, as we practiced earlier.
2. Draw lines in either direction and curvatures, both clockwise and anti-clockwise.
3. Draw them at various pace - fast, slow, fast to slow in a single line, etc.
This practice of initially drawing the lines fast and then slowing down will help your body get into smoother drawing action for the workouts and perspective exercises ahead.
12-15 mins : Practice drawing radial lines from out-to-in using a regular 6B pencil. This frees up your hand for the exercises to be covered in today's session.
<Warm up Ends>
Workout
Grid Template Reference Sheet for Session 6
Discussion: Intuitive Understanding of Lines and Planes in Perspective Space
Until now, we have always begun a perspective sketch from a base cube, grid or a product based overlay. In this four day session we graduate to the final level, where we start drawing 'freehand perspective'!
For this, it is essential to develop a sense of vanishing/ perspective lines. Initially, we shall be using a grid of points (G14) as reference to learn to draw Perspective Lines and Planes in Perspective Space. Later, we also practice on a perspective grid (G15).
(a) Perspective Lines - freehand exercise
(b) Perspective Lines - passing through points (vanishing points) on a reference grid
(c) Perspective Lines Converging to a Point - starting/ending away from vanishing points
(d) Perspective Planes - freehand
(e) Practice on Perspective Grid
22.1) Perspective Lines - freehand: 1 sheet - 10 mins
Perspective lines/vanishing lines are the lines that extend from the object to the vanishing points. For this freehand exercise, simply take a blank overlay sheet and mark about 20 random points on it. Draw lines to pass through any 2 points, starting 5cm before and ending 5cm after the marked points, as shown below. Complete for all points.
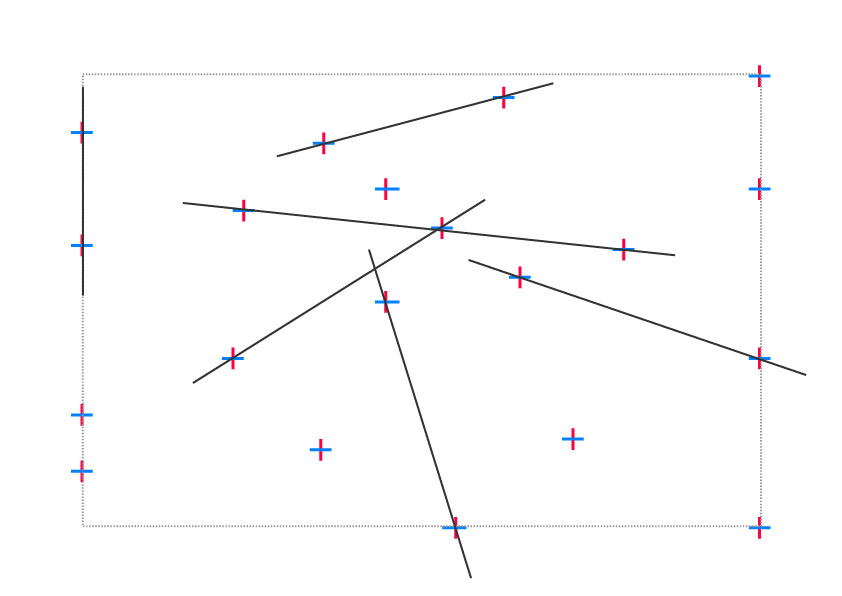
Image 22.1: Perspective/Vanishing Lines - freehand exercise
Note: Always keep your hand position as if you are drawing a vertical line. Maintain uniform pressure and thickness.
22.2) Perspective Lines passing through Two Points on Grid: 1 sheet - 10 mins
Practice drawing perspective lines passing through two points, but now using an overlay with a grid of points below (G14). Practice by starting 2cm before and ending 2cm after the grid points. Repeat for 3cm.
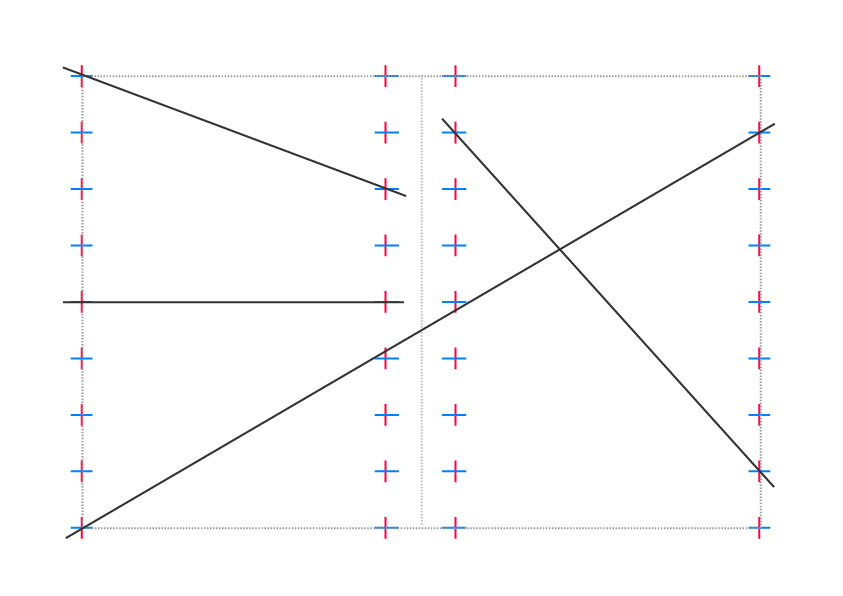 Image 22.2: Perspective Lines - passing through two points on grid
22.3) Perspective Lines - Converging at a Point: 1 sheet - 10 mins
On grid G14, fix the two top leftmost and rightmost points as the vanishing points (VP1 and VP2). Now draw inclined lines from one side converging to a the single point VP1 on the other side. Repeat for VP2. Ensure that the straight lines pass through both the points on the grid. Maintain uniform line thickness and pressure.
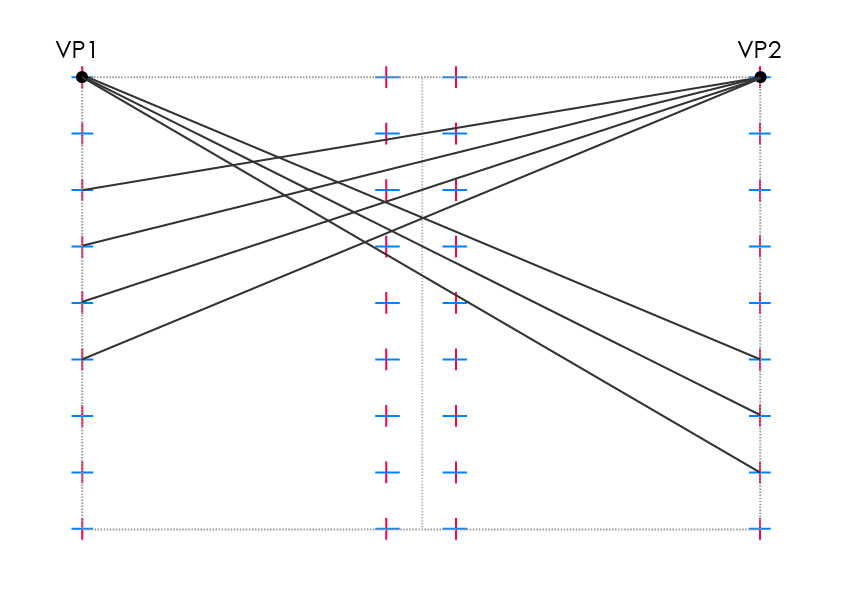
Image 22.3: Perspective Lines - Converging at a Point
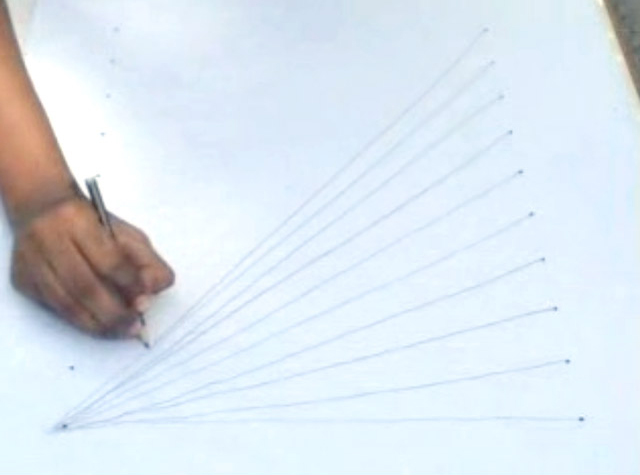
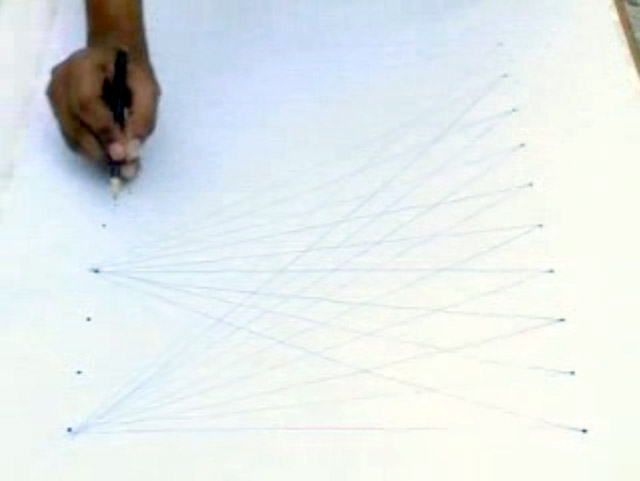
Video 22.1: Perspective Lines - Converging at a Point
As indicated in the video above, on the same sheet, fix two new vanishing points on the outer edge of the grid (as shown in image below) and repeat. Similarly mark and complete for different sets of vanishing points.
 Image 22.4: Perspective Lines - Converging at a Point, with new set of vanishing points
22.4) Short Perspective Lines: 1 sheet - 10 mins
Draw each perspective line such that the line segment lies equidistant from two marked points. Do this for following spacing distances on either side of the line from marked points. Refer image 22.5 below:
(a) 2 cm
(b) 5 cm
(c) 10 cm
(d) 15 cm, for longer lengths
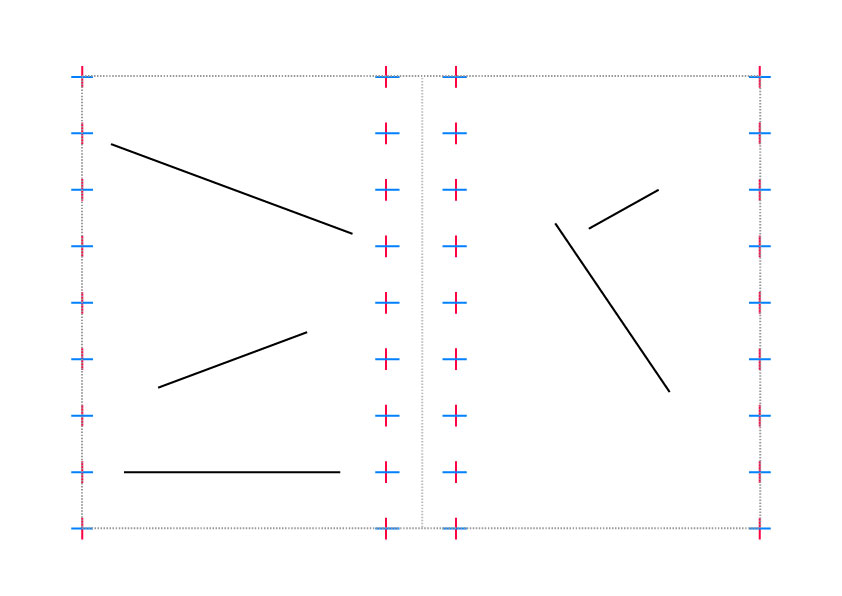
Image 22.5: Short Perspective Lines
Note: Practice of short perspective lines encourages internalization of location of vanishing points, an essential precursor to getting a 'sense of the perspective space' one will operate in while drawing surfaces and volumes in perspective.
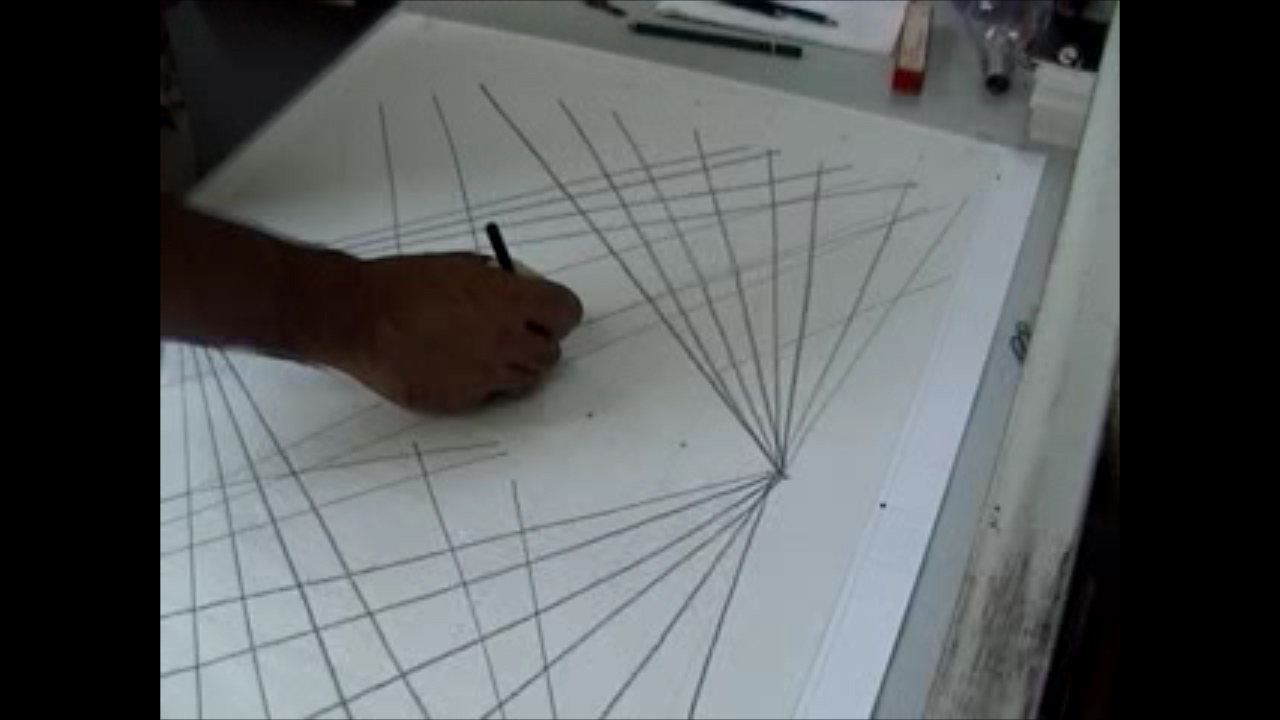
22.5) Short Perspective Lines - with increasing distance from each Vanishing Point: 1 sheet - 10 mins
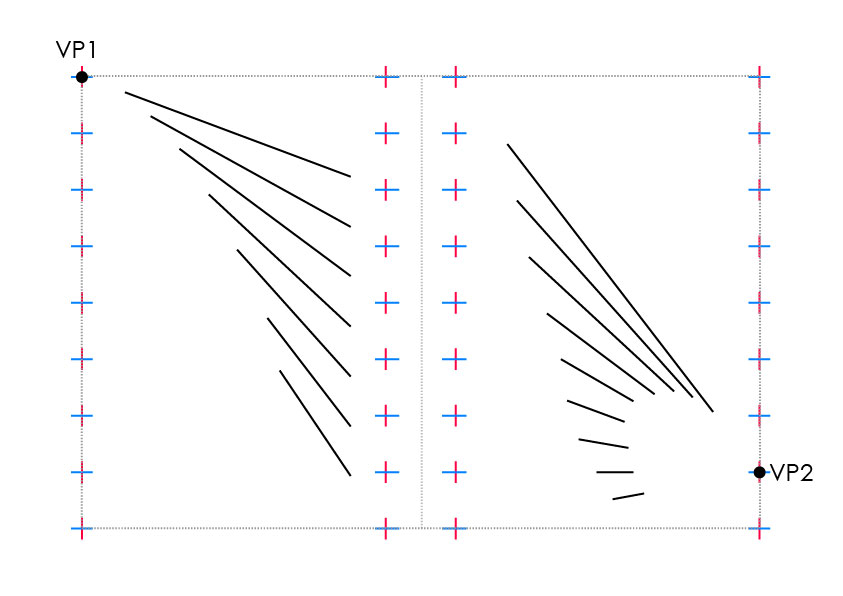
Image 22.6: Short Perspective Lines - with increasing distance from each Vanishing Point
Surfaces in Perspective
22.6) Horizontal Planes in Perspective: 1 sheet - 10 mins
Recall the exercise you did today, of drawing perspective lines converging at vanishing point. These network of intersecting lines are actually giving rise to planes in perspective space.
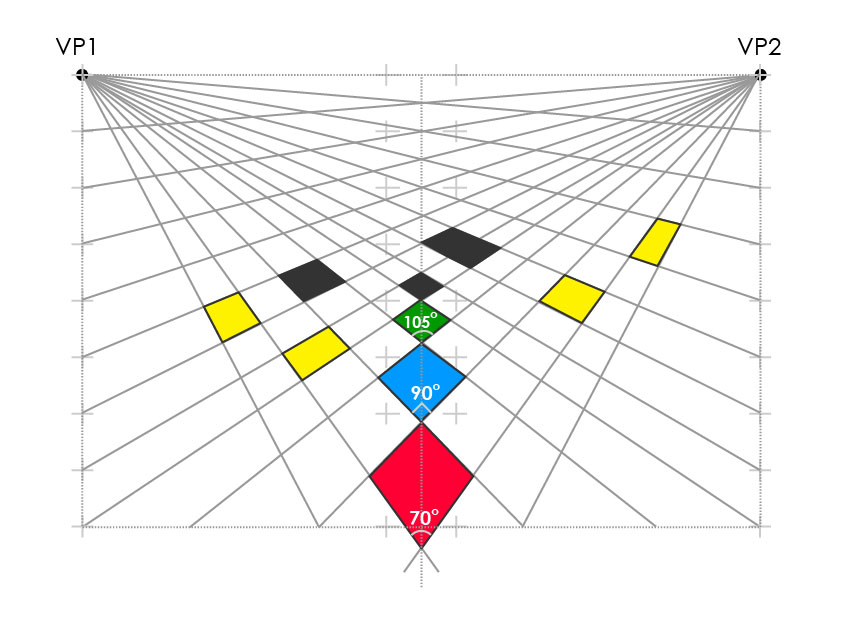
Image 22.7: Perspective Lines - Converging at a Point, giving rise to perspective planes.
Also notice how these planes distort as one moves away from the central region. This distortion occurs due to two types of error:
(a) nearest angle of the square plane in perspective is 90 degrees or less, (compare the nearest angles of the three square perspective planes above - 90 degrees for blue, 70 degrees for red and 105 degrees for green). Where do they lie? Compare with the grey square planes marked 'C' in image 22.8 below)
(b) greater horizontal distance from the original, centrally located square plane in black (such as the orange square planes in the image above). Compare with the grey square planes marked 'B' in image 22.8 below.
Why does error (a) occur?
Consider an observer looking at a book held horizontally at eye level. The nearest angle is 180 degrees - a straight line. As he lowers the book, the nearest angle becomes more acute until it finally reaches 90 degrees. When this happens, the book is at right angles to his line of sight and he is seeing it in plan. It is obviously impossible for a plan view to occur in a horizontal vista; thus it is impossible for any square in true perspective to have a nearest angle of 90 degrees. Therefore, any square in a perspective vista whose nearest angle is 90 degrees or less will be distorted.
So, is there a 'safe region' for an ideal perspective?
Yes indeed! This region is achieved by drawing a circle from the horizon that intersects at the vanishing points (marked in green in the diagram below).
Areas closest to the centre, as shown below, gives probably the best perspectives (Planes A, A1 etc.). Although you will still notice some distortions due to factor (b) discussed above (notice the slight skew in planes marked 'B'), the resulting perspectives in these regions are more or less acceptable. As you venture out of this circle, the planes (marked 'C') below begin to become much more distorted.
Reference: Doblin J., (1974) Perspective, a new system for designers, Whitney Publications, N.Y. [pg 18]
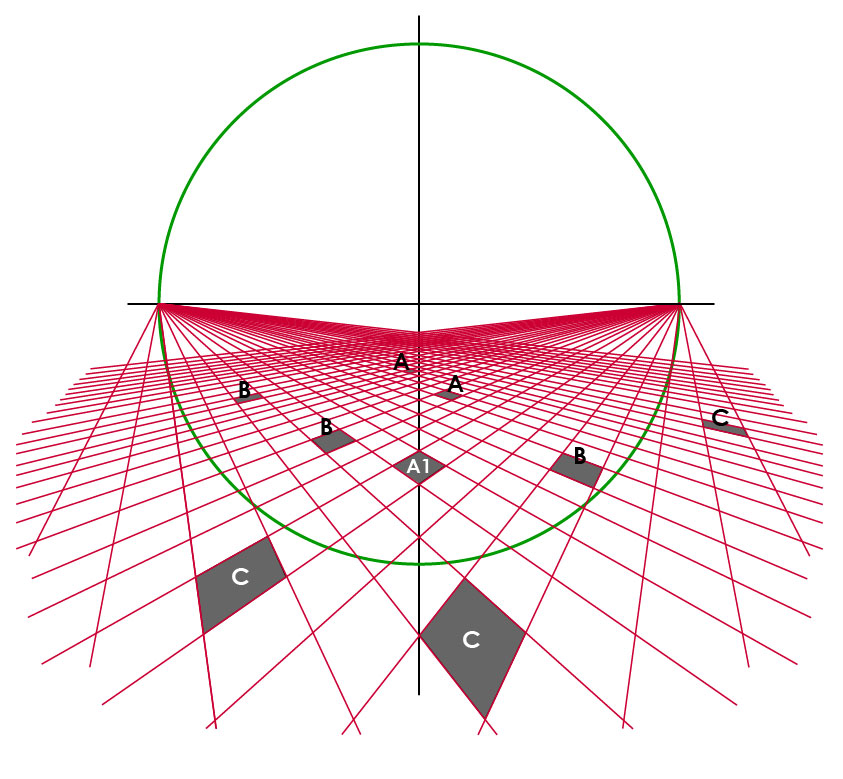
Image 22.8: Safe region for Ideal Perspectives
Why this?
From geometry we know that any angle formed on the perimeter of a circle by lines from the intersections of the circle and its diameter will be a right triangle. Thus any nearest angle that touches the circle will be distorted; any nearest angle within the circle will be greater than 90 degrees.
Draw Horizontal Planes in Perspective - also note............how it changes above n below
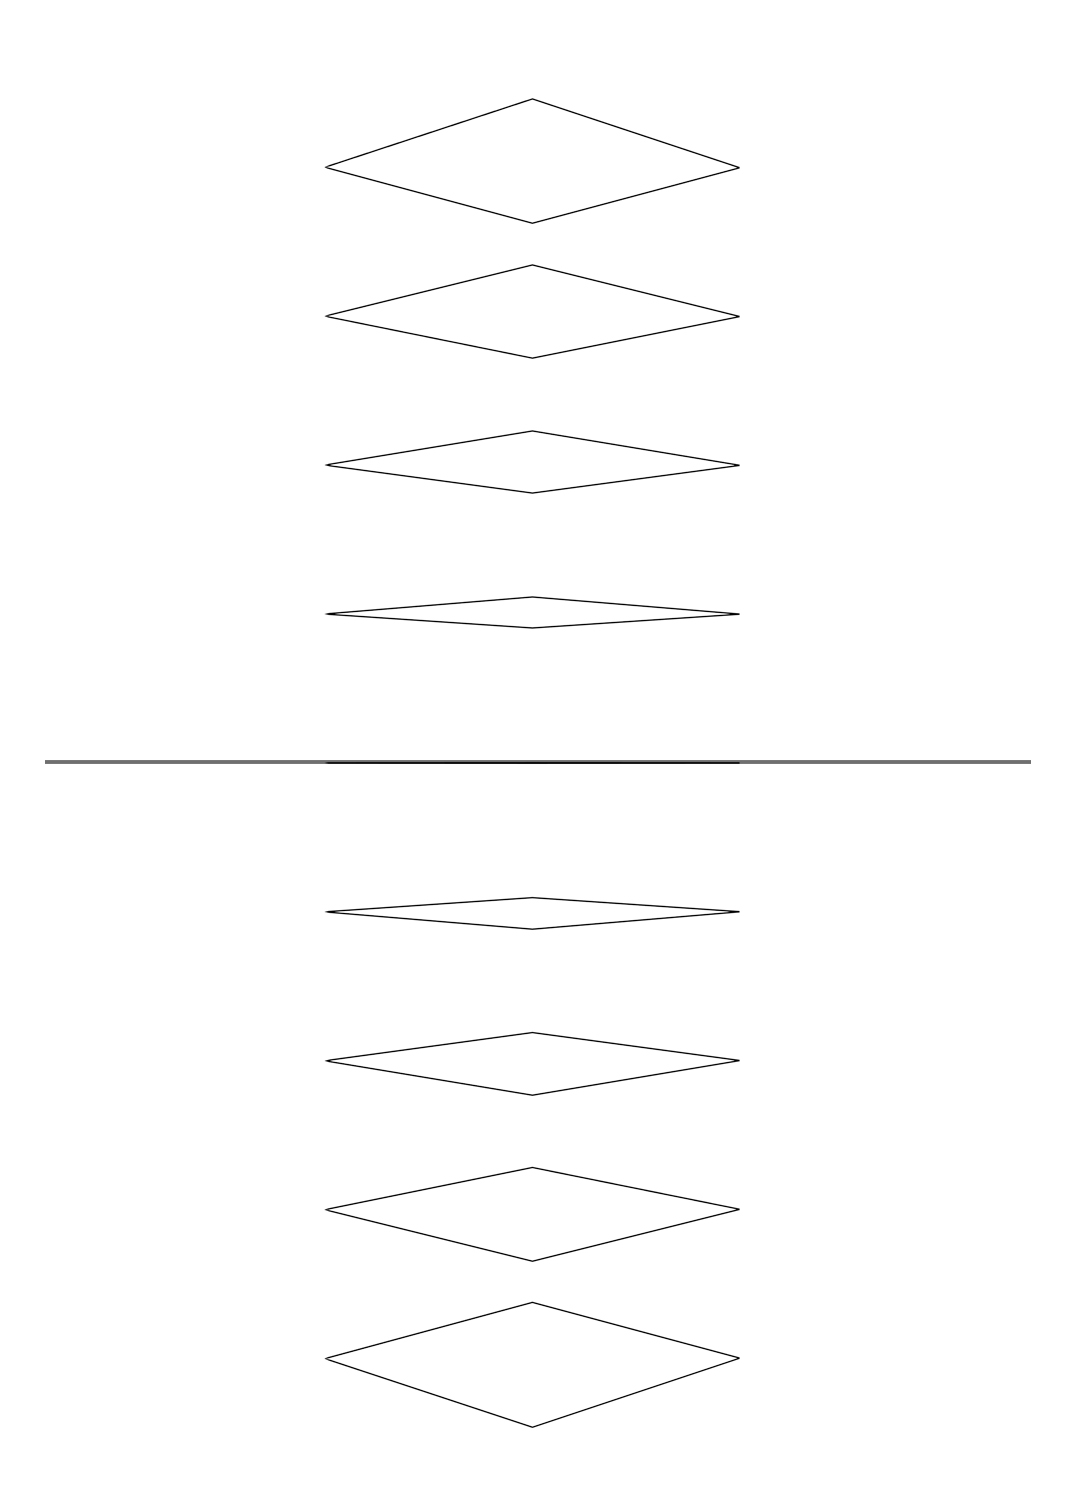
Rectilinear Planes @45 deg to Picture Plane
Note: Situate the planes at different distances from the picture plane for this. You could also try different orientations for practice, as shown below.
22.7) Vertical Planes in Perspective - 1 sheet - 10 mins
Now, on G14, draw short perspective lines from one side converging to a single vanishing point on the other side, and drop perpendicular from parallel vertical lines to join two edges to form vertical planes, as shown in the image below.
, and do this in either direction, as earlier.
Now, on a fresh tracing sheet, draw vertical square planes with your previous exercise sheet (the network of perspective lines converging at a point, ref. image 22.4) as a base grid.
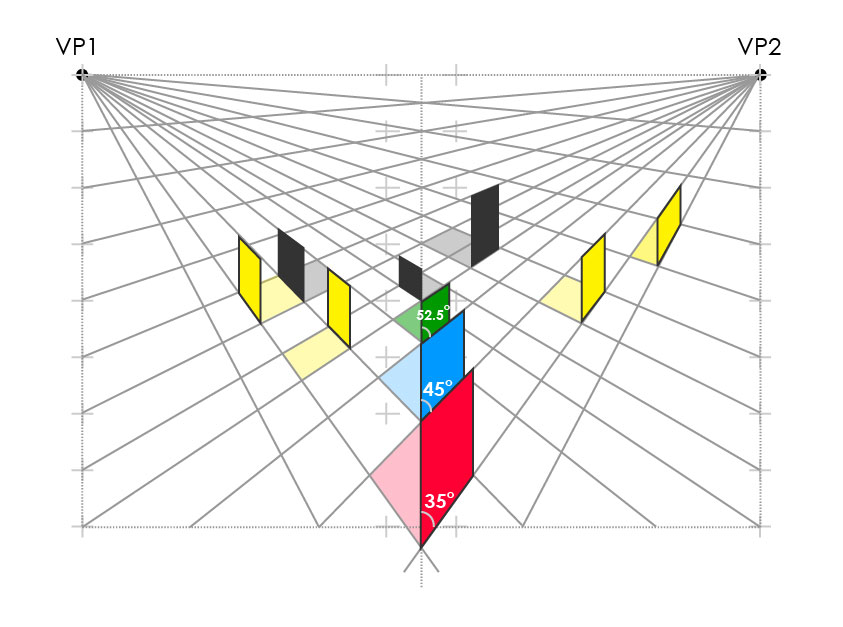
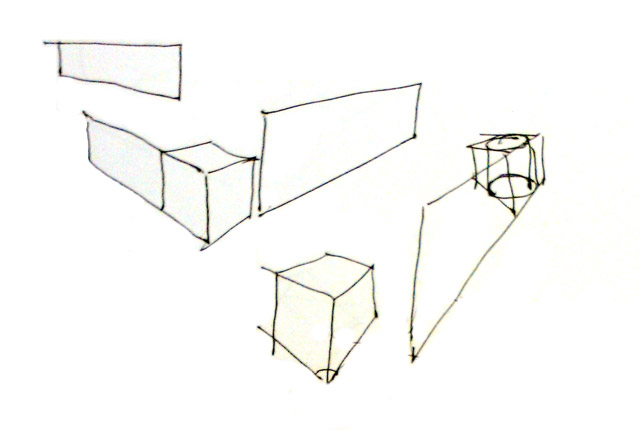
Walls in Perspective Space
Do you notice that as you move away from the horizon line, even the vertical square plane or 'wall' closes in. With this knowledge, we are now ready to develop cubes in perspective space from perspective lines.
22.9) Perspective Line - Development of Cube - 1 sheet - 10 mins
Now, on G14, draw inclined lines from one side converging to a single point on the other side, and do this in either direction, as earlier. The intersected areas can be so drawn as to develop a cube from them. Here again, straight lines must pass through two points on either side of grid.
Development of Cubes using Short Perspective Lines
Take a blank sheet and draw a horizon line in the centre, leaving 2cm margins on either side of sheet edge, and mark VP1 and VP2 on either end. Draw cubes in perspective space at various distances from the horizon line by drawing short perspective lines that intersect to create planar surfaces, so aligned as to form cubes.

Video: Development of a Cube from Perspective Lines converging to a Point
with vanishing lines video
cubes in pers space - pers lines
< Workout Ends >
Sense of Perspective Space
Discussion: Drawing Spheres in Perspective
The sphere is unique because in any perspective, it remains a circle in outline. The ellipses are its equators; its outline is drawn from the perspective center of the cube and is tangent to the extremeties of the ellipses. (Jay Doblin, pg 42)
Now with this understanding, try to draw three adjacent spheres in a perspective space in the exercise below.
1. Aim: Drawing Spheres in Perspective
2. Set up:
Tracing sheets, measuring ruler.
3. Exercise:
Download the 3D grid provided and draw three spheres in two-point perspective, one in the centre and two on either side, as indicated on the plan view image below. [Download...D22_3d-grid-for-drawing-spheres]
Three Spheres in Plan view
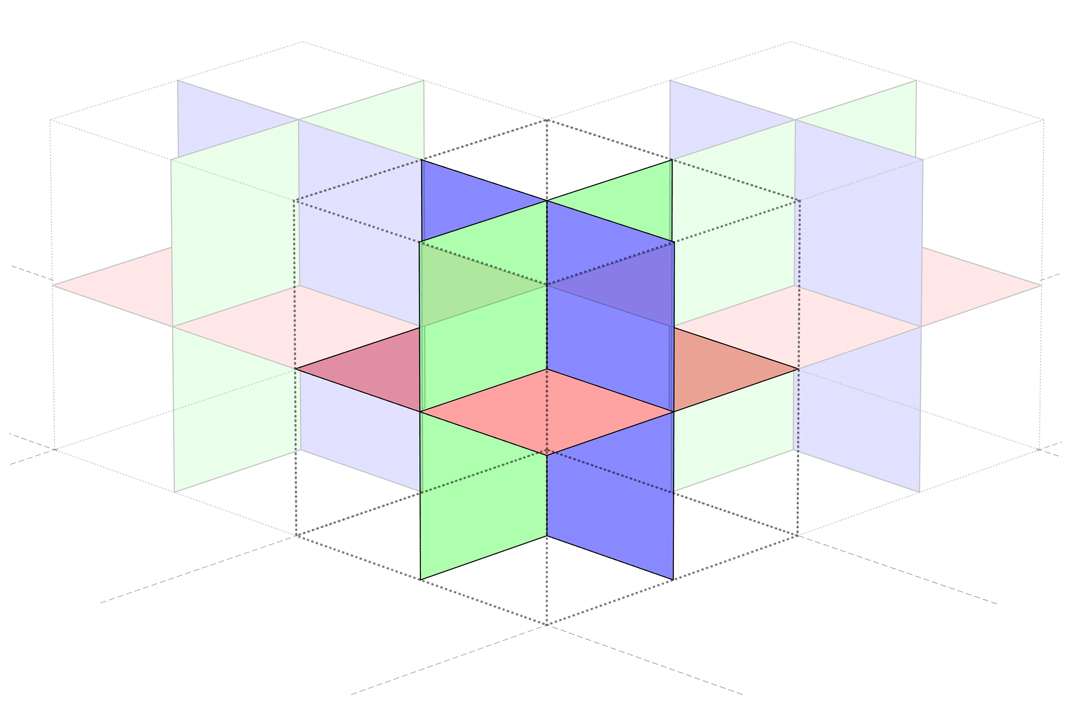
Sphere Template
Overlay on a correctly printed solution sheet to compare your solution. [Download...D22_three-spheres-in-perspective-solution-sheet].
< Sense of Perspective Space and Day 22 End >