Objective:
Ability to draw and illustrate to express ideas is fundamental to all designers. This module presents a comparative approach of illustration techniques using:
1. Free-hand illustration
a. Using Paper and Pencil technique
b. Using water colours technique
2. Digital illustration technique on a computer
It will introduce the basic understanding of
- Figure and ground
- Scale and Proportions
- Light and Shadow effects in creating expressive illustrations
In this module the techniques are demonstrated step by step choosing two subjects:
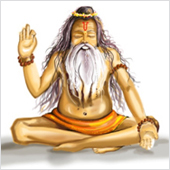
i) Illustration of an Indian Sadhu and
ii) Illustration of a Tree
Further these two illustrations are combined to generate a scene: "Composition of the sadhu sitting under the tree meditating in a forest" using digital technique.
Illustration:
An 'illustration' is an artwork that makes something clear or attractive. A digital illustration employs the use of a pen-tablet in place of traditionally used paper and pencils or brushes, and software which tries to mimic the use of physical media through various brushes and paint effects.
However in order to create a digital illustration the basics of traditional illustrations must be clear. Hence in this particular module the basics of traditional pencil sketching and painting are explained followed by the digital illustration. For comparison purpose a tree and an Indian Sadhu have been used for the all the media.
Tools:
Basic Tools -
• For Pencil Shading
- Put Pencils Detail by Strokes
• For Watercolour
- Basic Tools - Brushes
- Tools required for water colour illustrations
• For Digital Illustration
Basic Tools for Pencil Shading:
There are many types of pencils for drawing and shading. For drawing it is recommended to use H.B & 2B. For Shading, pencils that are easily available in the market include (H.B, 2b, 3b, 4b, 5b, 6b, 8b, and 10b).
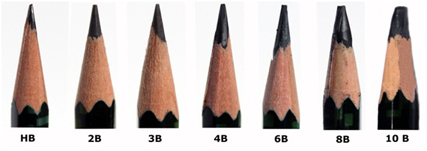
- Put Pencils Detail by Strokes:
Shading stokes: Lighter tones to darker tones in.

Basic tools for Watercolour:
Although Watercolour painting - an old method used in the Egyptian on papyrus and by the Chinese on silk - its original use on paper was to elaborate upon line drawings with monochromatic washes. It gradually evolved to become an important medium on paper.
The traditional and most common support for watercolour paintings is paper. Watercolours are usually transparent, and appear luminous because the pigments are laid down in a relatively pure form with few types of filler obscuring the pigment colours.
The beauty of watercolour painting lies in its fresh, transparent effect, and the approach must often be one in which the value, colour, and drawing are accomplished in a single operation.
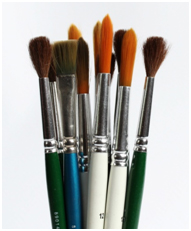
- Basic Tools - Brushes:
Artist's paint brushes come in an array of sizes, shapes, and hairs.
Example: Rounds, Flats, Mops, Filbert, Rigger, Fan and Acrylic brushes.
It’s selection mostly depends on which type’s of medium we are using. In this module we are going to learn water colour and for which we will use round brushes. They are specified Number wise from 0/00/1/2/3/4/5/6/8/10/12/14.
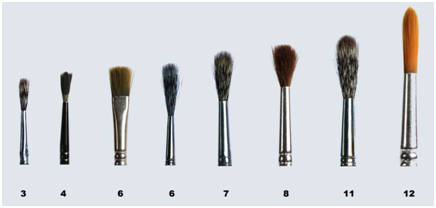
- Tools required for water colour illustrations:
Water colour, Colour plate, water, Dry cloth.
Basic Tools for Digital Illustration:
Digital Tools include: Pen tablet or a mouse. Graphic tablet is an important tool for a digital art illustration because it allows the user to make a mark easily in any direction. Using pen tablet Designers’ can make illustrations with more lively effects and the art work are more sharp.
Software for Graphic Design applications:
Corel Painter, Adobe Photoshop, Art Rage, Sketchbook pro and GIMP, Krita
Pencil Sketches:
• Paper and Pencil technique for Illustrating a ‘Tree’
• Paper and Pencil technique for Illustrating ‘Sadhu'
Paper and Pencil technique for Illustrating a ‘Tree':
Step 1:
At first select paper, shading pencils, eraser. Prepare to draw starting with H.B and 2B grade pencils since these are light pencils.
Step 2:
After drawing the outlines, fill to shade starting from light to dark using shading pencils of grades 2b, 4b, 6b, 8b and 10b. Keep in mind the direction of light falling on the tree. Accordingly fill and vary tones of light and shade on drawing of the tree.
Step 3:
Final touches can be given using 10b grade pencil.
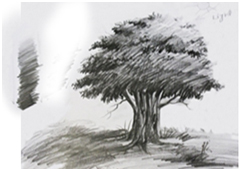
Paper and Pencil technique for Illustrating ‘Sadhu':
Step 1:
At first select paper, shading pencils, eraser. Prepare to draw starting with H.B and 2B grade pencils since these are light pencils.
In illustrating the human body remember to follow human proportions. We know that a perfect body is 8 heads high.
For illustrating a ‘Sadhu’ in sitting position the posture could be assumed to be 4 or 4/1/2 head proportion.
With this as guideline draw a light sketch of the ‘sadhu’ roughly maintaining the body tobe 4 times the proportion of the head.
Step 2:
After completing the sketch of the Indian ‘Sadhu’, fill to shade starting from light to dark using shading pencils of grades 2b, 4b, 6b, 8b and 10b. Keep in mind the direction of light falling on the body. Accordingly fill and vary tones of light and shade on drawing of the ‘sadhu’ to make the illustration realistic and three dimensional.
Step 3:
Final touches of light and shadow can be given using 10b grade pencil to complete the illustration.
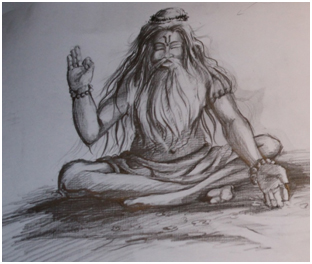
Illustration using Water colour:
• Illustrating the ‘Tree'
• Illustrating the ‘Sadhu'
Illustrating the ‘Tree':
Step 1:
At first select suitable hand-made paper, shading pencils, eraser. Prepare to draw a light sketch of the ‘tree’ starting with H.B and 2B grade pencils since these are light pencils.
Step 2:
Prepare water colour swatches to get the tonal variations of light and shadow: lemon yellow, gamboge, yellow ochre, sap green, vermilion green, cobalt blue, and Brown. (refer colour chart)
Always remember to study the direction of light falling on the tree. According fill colour on ‘tree’ with tints in the direction of light and darker shades farther away from the direction of the light source.
Step 3:
Final touches with colour can be given using 3 and 12 number brushes to achieve details strokes and appropriate colour. Note the shadow of the tree falling on the ground. Use suitable colours and shades to create this effect.
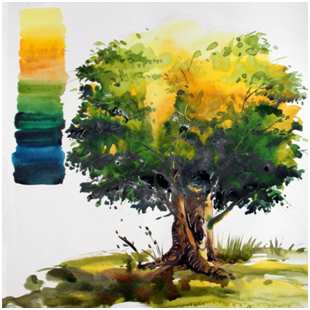
Illustrating the ‘Sadhu':
Step 1:
At first select suitable hand-made paper, shading pencils, eraser. Prepare to draw a light sketch of the ‘sadhu’ starting with H.B and 2B grade pencils since these are light pencils.
Step 2:
Prepare water colour swatches to get the tonal variations of light and shadow: lemon yellow, gamboge, yellow ochre, sap green, vermilion green, cobalt blue, and Brown. (refer colour chart)
Always remember to study the direction of light falling on the ‘Sadhu’. According fill colour on ‘sadhu’ with tints in the direction of light and darker shades farther away from the direction of the light source..
Step 3:
Final touches with colour can be given using 3 and 12 number brushes to achieve details strokes and appropriate colour for the eyes hair colour etc.
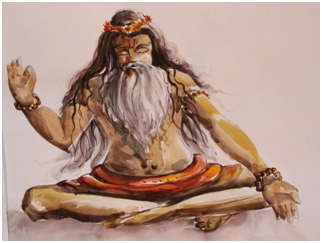
Making of the Indian 'Sadhu' and 'Tree' in Digital Painting (Video):
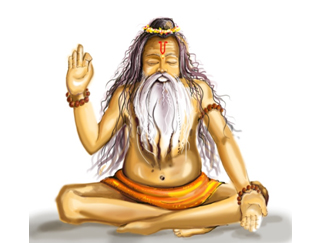
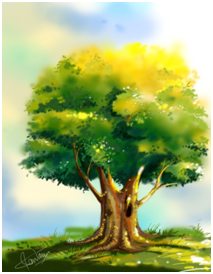
Creating a digital composition of a ‘Sadhu’ meditating under a tree in a forest using digital illustration of ‘sadhu’ and ‘tree’ (Video)
Using the different features of Photoshop including drawing tools, editing tools, layers etc. it is possible to merge together Tree & Indian ‘sadhu’ into one composite composition. Further effect of a dense forest can be created by copying part or whole elements of the tree, filling the ground in shade of blue and merging and blending images using ‘feather’ feature to create illusion of depth. The final composition is of a ‘sadhu’ sitting meditating under a tree in a forest.
