Design Resource
Idol Making - Kinnal, Koppal
Wood Carving Fine Art
by
Prof. Bibhudutta Baraland Sowmya B. N.
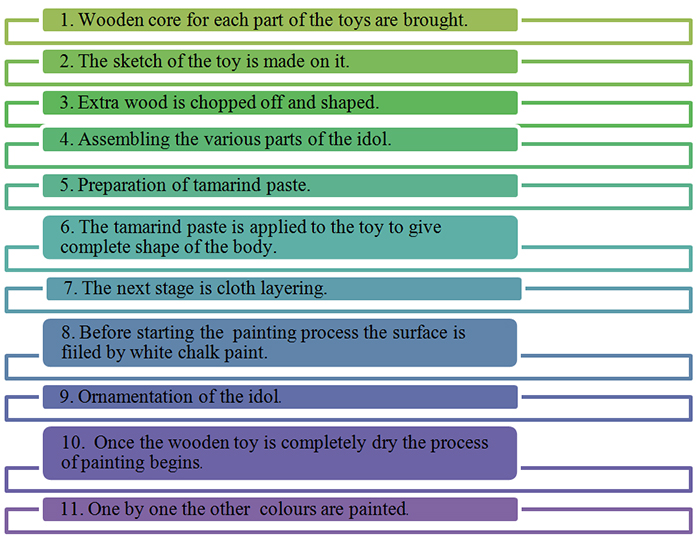
Wooden core for each part of the toys are brought. Usually artisan select the lightweight wood such as Poniki. Artisan draw the rough sketch of required shape on the wooden piece using pencil. After finishing the rough sketch the extra wood is chopped off and shaped using saws, chisels and files. The unwanted wooden piece is cut out by using saw tool. The complete carving of the wooden piece is done by using chisel and hammer. Every part of the toy is done separately and attached all together by using adhesive, nails or pins.
Once the required model is obtained, artisan start to applying the tamarind paste over the wooden model. The Tamarind paste is also called as ‘Kitta’. The tamarind paste is prepared by using tamarind seeds which are boiled until soft is mixed with gum and sawdust from off cuts or jute. The paste is applied to increase the thickness of the wood. This paste is pressed into shape using thumb. The paste is applied to build up facial features. This is an interactive process and it takes numerous improvements to create a perfect shape. Once this is completed the surface is finished using fine files and sandpapers.
The next stage is layer of cloth. Usually layer of cloth made from old sarees. Tamarind gum is pasted onto small patches of cloth before being placed on the figure, pulling and stretching it to ensure there are no wrinkles. This is applied to prevent cracks which might develop in the tamarind paste as it dries.
The jewellery part of the idol is made by using mixture of cotton, Chalk powder and white adhesive. This mixture is prepared by hammering properly. The tail and horn part of the idol is made by using metal wire.
To prepare the surface for painting it is primed firstly with tamarind gum followed by two coats of white chalk paint. After this is dried, the surface is finally sanded and made ready for painting. To provide finer details and embossing effect, thicker version of chalk powder paste is applied. First the whole model is painted with white primer and any gold or metallic details are covered with aluminium foil which appears as shiny silver.
Once the wooden toy is completely dry, the process of painting begins. One by one the other colors are painted. The choice of colour is based on tradition. Skin tones are usually blue, yellow and orange. A great level of detail is put into shading decorative pieces. The final finishing touch is to paint silver, gold and black lines to detail all the features.
Flow Chart:


