Design Resource
Lippan Artwork - Nagpur, Maharashtra
Mud Mirror Art
by
Prof. Bibhudutta Baraland Srikanth B.
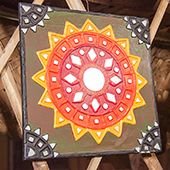
The process for making Lippan artwork begins with taking an MDF (medium-density fiber) board, of required dimensions. MDF is more stable than solid wood and extends a characteristic of withstanding heat and humidity. This is used as the base for the Lippan Work. Then desired designs are drawn on the board using a pen and a ruler. Once done, an appropriate ratio of Ceramic powder and the synthetic adhesive is taken into a large bowl, to be mixed to form a soft dough. Applying fabric glue or synthetic adhesive over the pencil sketch on the board, the artisan then spreads it correctly over the design drawn. Now small amounts of ceramic dough are rolled into thin coils with fingers, to be pasted over the design to create boundary lines at first. Extra care is taken to make sure that the dough coils do not crack while being applied to the design. For this, the artisan moisturizes their fingers with little water while dealing with the coil placement. When the basic framework is ready, the next is to fill in the line arts with the remaining dough. Once the sticking process is finished, the artwork is left for drying, usually for a day. After drying, white acrylic paint is applied as a base coat, followed by a second coat of any intended colour after 15 minutes gap. Now, at this stage, enough mirror tiles are kept ready to be attached to specific areas of the art, with respect to the design pattern. Then with the cleaning of the mirror with a wet cloth to remove any colour or glue stains, the making process of Lippan Artwork comes to an end. It is now ready to be hanged on a wall or framed as a showpiece in the houses.


