Design Course
My First 3D Animation
Introductory
by
Animating
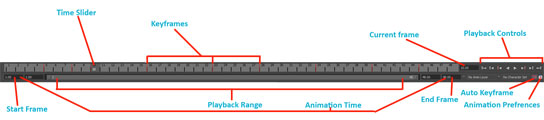
The Time Slider and the Playback controls:
The Time slider shows a range of frames, the current frame of your scene, keyframes that you may have set, the autokey toggle, the animation preferences button and many other features. Once more, these are very similar in all animation software (not just 3D software). Go to your software help and familiarize yourselves with these features. For now, how to set the length of your animation, setting keyframes and using the playback controls is all you need to know well, but there is no harm in knowing more.
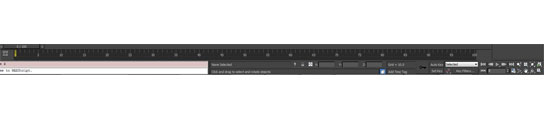
3ds Max Timeline
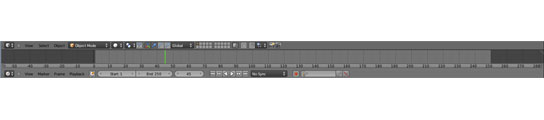
Blender Timeline
What is a keyframe?
It is an important value of any property like Shape, position, rotation, etc. needed at a particular frame in order for the animation to work well. To put it simply, it is the 'key' for that specific 'frame' to achieve good animation.
To become a good animator, the most important thing that you need to learn before anything else is identifying the keyframes that are needed for your animation and setting them. You need to decide firstly, what is the shape, position or Value (as in the bend deformer) that you want to set as the keyframe and secondly the Timing for that keyframe i.e. which frame do you set it on.
In Maya : Hotkey-  sets a keyframe on the current frame of animation
Keep in mind that doing this will set a keyframe for all the animatable channels of the selected object. This may become a problem later as you could end up with unwanted keyframes in the channels that you are animating.
If you want to set keyframes only for specific values, then highlight the particular parameter in the channel box, right click and select the 'Key Selected' option from the drop down menu. This will only set the keyframe for the highlighted parameter and keep all other channels clean of unwanted keyframes.
Subsequent to the first keyframe, you can use the autokey toggle to set the remaining keyframes
(Autokey off-  ) or automatically (Autokey on-
  ) If the Autokey is off, do remember that no keyframe is being set and unless you set it manually, you will lose any changes that you made.
Find out how setting keyframes can be done in your software and recreate this Bend animation. Experiment with the amount of bend, the timing between keyframes. Learn this well, as this is what you will need to do all the time.
So you have created your first animation. Before you go ahead, let's recap the process.
1. Creating the Model: For any animation, you need to keep in mind what is the animation you want the object to do. If the way you have created the object does not allow you to do that, you may just have to start from scratch.
For example, we had several vertical subdivisions for the cuboid used in the bend animation, but to achieve the normal shape of the object, we actually just needed the two ends. But what would happen if you did not have the subdivisions? How would the bend look?


It is not much work to add the additional subdivisions to the cuboid as required. But with a more complex object?
So when creating the model always find out how the model is going to be used.
2. Preparing the object for Animation: With complex characters, this can get quite detailed and is also called Rigging. For this, often controls are created on the object so that the animator can animate intuitively and not worry about the technical problems of the character to be animated. We have simply used a Bend deformer to do the task, but principally we are doing the same thing, creating an animation 'rig' for our character.
3. Setting Keyframes: Before setting keyframes, try and visualize the animation, whenever possible, understand and plan the timing in advance and only then proceed to set them. You can always change and improve the keyframes and their timing later, but planning will considerably increase the quality of your animation and believe me, make the process truly enjoyable.
4. Watching the Playback and Improving the Animation: Though, in the video, we have not shown it, we hope you do this when you try animating. It is wonderful to see your animation play, but even better if you can push it to be as good as you can make it. So don't be lazy. If you consistently do this, your animation skills will improve very quickly with each animation you do.
This has been a taste of the animation process. You can learn the next steps and revisit some of the stuff you have seen in this module in the 'Bouncing Ball Animation' module.