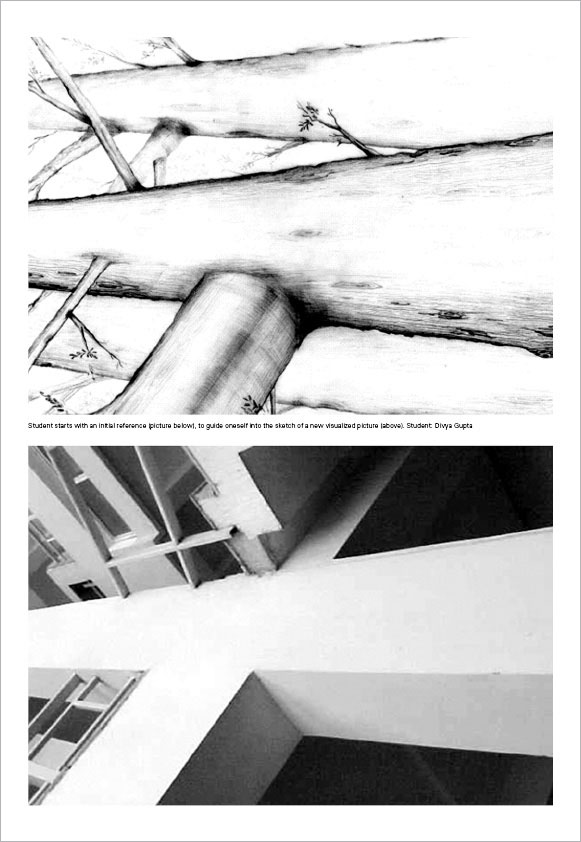
It depends on each student to constantly work towards honing the skill of drawing three-dimensional forms. Exercises can only create environments or approaches to understanding the basics of three-dimensional drawings, but to be able to draw them successfully, apart from class assignments, one has to maintain his/ her sketchbook and keep on practicing this art.
Our attempts to draw cubes kept on a white background in the previous task, must have led us to new experiences and difficulties. To make the task easier, we added colored backgrounds with grids beneath the cubes. It gave us reference points or clues to plot the cubes on a two-dimensional surface like paper. We also noticed how solid objects when made transparent, (i.e., when the structure is made visible) allowed us to see through the solid cubes, which usually does not happen in the real world unless the object is made of a transparent material, like glass. In this assignment, we will sketch structures in our neighboring environments (outdoors), buildings, large halls, corridors, etc.
Task 09:
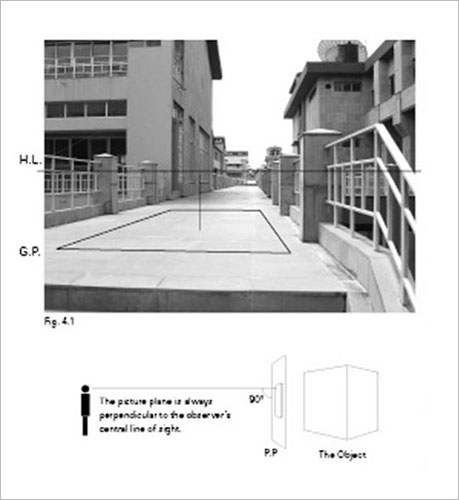
See Fig 4.1 and read the terms explained below the picture. Your task begins by shooting a picture (black and white) as shown in Fig. 4.1; either in one-point or two-point perspective. Shoot a picture with a digital camera on the finest quality that your camera offers and take a print of the same on an A4 sheet. Cover this print with a tracing sheet of A4 size and trace the picture (not exactly) but to get a general idea of what the picture is about, by creation of contours. No need to shade the picture. It should be a line drawing. Be conscious while tracing the lines onto the tracing. Complete the picture by depiction of the imaginary horizontal line shown in Fig. 4.1.

Task 10:
Take a new tracing sheet. Keep it above the previous tracing sheet. Now trace out some structures/ buildings on this tracing sheet and then visualize new structures within the same solution with modifications. Use horizontal line as a reference to create your new visualized picture. You are expected to alter the picture to create new buildings or add trees or imaginary cubes. Feel free to visualize new and interesting solutions (apart from those mentioned above).
Consider the Diagram:
Picture Plane (P.P.):
When we draw a perspective, we transfer onto a drawing surface what we see through an imaginary transparent picture plane; the drawing surface becomes the equivalent of a picture plane.
Ground Plane (G.P.):
The ground plane is a horizontal plane of reference from which heights in perspective can be measured. For example in the picture above the ground plane is the floor of the passageway.
Horizontal line (H.L.):
The horizon line runs horizontally across the picture plane and corresponds to the viewer’s eye level above the ground plane. For a normal eye-level perspective, horizon line is at the standing height of the observer’s eyes. It moves down if we sit down on a chair or moves up if we look from a second-storey window. Even if actually not seen, the horizon line should be drawn lightly across the drawing surface to serve as a level line of reference for the entire composition. (Francis D.K. Ching)1


