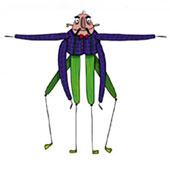
With the keyframes in place, intermediate frames are drawn in between the keyframes to create a sense of motion. In this step, the animation goes from still images to smooth movement. There are two methods to draw inbetweens in 2D animation:
1. Pose to Pose - Key poses for a movement are made and then inbetweened with intermediate frames. This method helps maintain the character proportions during actions. It also makes it easier to edit or make fixes in action since you get an overall idea of the action before making the intermediate frames.
2. Straight Ahead - Frames are drawn in sequential order. This method is better for an unpredictable movements like flames, water, etc. where the key poses cannot be decided in advance.
To create a smooth video, a frame rate of 24 fps (frames per second) is required. An animation made in 24 fps is said to be animated on one. However, to reduce labour and increase efficiency in smaller animation projects, the animation is often made on twos (12 fps) or threes (8 fps). Our film was animated in twos, or in 12 frames per second. The inbetweens for our project were made in two stages - actions and lipsync.
• Actions
The actions of the character and the motion of props are drawn first. The character’s actions are primarily inbetweened by the pose-to-pose method of animation, to ensure that the character’s proportions are maintained throughout the scene. Small movements may be drawn by the straight-ahead movement. The number of intermediate frames between two poses defines the pace of the movement. Fewer frames create faster movement while more frames create slower movement. The frames drawn in this stage are rough with only the main elements like clothes and hair. The frames were drawn with a red brush so that the final black lines in the clean-up step are easily differentiable.


• Lip Sync
In animation, ‘Lip Sync’ is the process of synchronising dialogues to a character. This stage breathes life into the character and makes them relatable. Dialogues were recorded by voice actors in the animatic stage. In order to animate facial movements, the straight-ahead method was adopted as it was easier to playback each dialogue till it was synced perfectly. In order to understand mouth shapes for different sounds, we made use of a phoneme chart. A phonemes chart establishes mouth shapes for different phonetic syllables.

Fig 12. Phoneme Chart
Apart from a phoneme chart, we also recorded ourselves acting on the dialogues. This helped us gauge the movement of other facial features such as face shape, eyebrows and nose. It also helped us understand how different emotions affect these facial features. A few important aspects that we had to keep in mind in this stage were -
- Characters must blink naturally
- Eyes close when a character turns
- Position and shape of the eyes must be consistent and flow naturally across frames.
A library of different mouth shapes was developed which made these faces reusable. The number of expressions required for each dialogue was calculated based on the number of syllables in each word. All frames were drawn in red. This stage marks the end of rough animation.


